I was very excited when I came across this recipe for Homemade Fabric Softener! I use fabric softener to help make clothes and sheets smell nicer for longer, but I also use it to help keep our stuff soft and fluffy. The down side to that is the kind we buy is 90 oz and says it does 105 loads and is almost $7 a bottle and rarely on sale. I don't use quite as much per load as the directions say to help it last longer, but I am doing at least one load of laundry a day to stay on top things. It all really adds up! When I found this recipe, I knew I would be trying it as soon I finished out the bottle of fabric softener that I was using.
I am including the recipe for the fabric softener along with some of the pictures I took of the process. It is super easy to make! It uses 3 ingredients and took 10 - 15 minutes to make.
I reused the bottle of Downy that I had just finished. It says it does 105 loads. So, I am going to see how my homemade fabric softener compares. I labeled the bottle before I started mixing everything together. The bottle of Suave conditioner on the left is only 15 oz instead of the 16oz (or 2 cups) that the recipe calls for, but I think it worked out just fine. The best part... it only cost $0.98!
It was very hard to get pictures of the steps. I poured the 6 cups of hot water into the container, and then squeezed the conditioner into it. Then, I shook it like crazy! Every so often, I would unscrew the cap to let some of the air out, and then continued to shake.
**BE CAREFUL if you do this!! The hot water in a closed container makes it sort of "explode" when you release the pressure.**
Then, you add the vinegar and mix well.
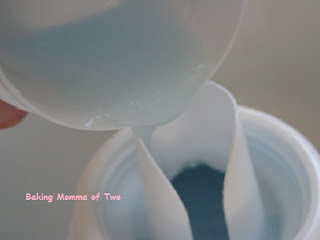
Mine was this consistency when it was all done being mixed.
I poured what was in the cap back into the container in hopes of a getting a good idea for the consistency. I think it was right on par with my store bought stuff. :)
I am so happy with how this turned out. I didn't do the exact math, but I think this only cost me like $2-$3 to make. My clothes are still soft and smell nice. I used a scent that isn't super strong because I typically use scent free stuff.
My one word of caution.... the first load that I tried to use this with I had the problem of the top layer being more "suds" and then the liquid came out very fast. I made a little bit of a mess! From that point on, I just gave the bottle a little shake before trying to pour any out. The next few loads were still a little tricky, but since I have used a little more from the bottle it has been going much better!


No comments:
Post a Comment